ShopDreamUp AI ArtDreamUp
Deviation Actions
I wrote about the reason why we chose Klein & Lisbeth in the Lisbeth Journal entry. This costume took about a month on and off in April/May 2015. It was more experimenting than anything - pleather is weird  [Update: Added more details in July for Mechacon 2015]
Klein is a very interesting character and even though he shows no interest in Lisbeth in the show, I feel like if given the time they would get close and be together They have the same friends and age is just a number~ Besides Klein acts 16 anyway! Anyway, no ship wars here, just appreciation for a character who deserved more.
This journal is about Klein's costume specifically, read about Lisbeth's costume here.
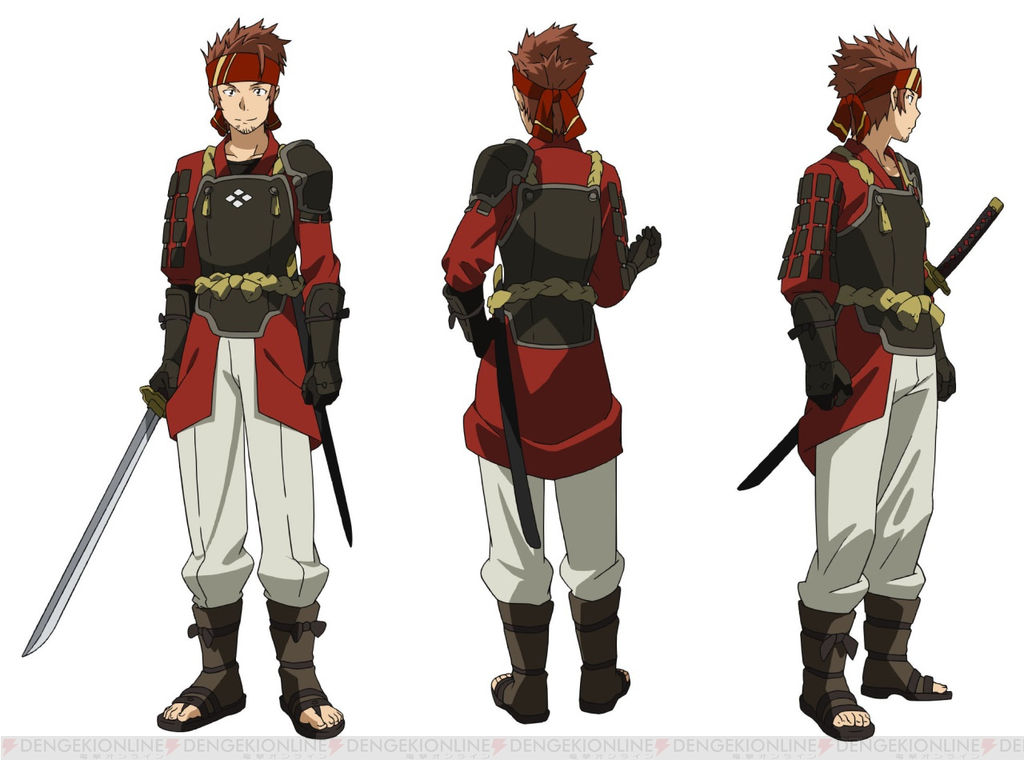
Klein has 4 in-game outfits (as of the current GGO Arc): Day 1, Early SAO, Later SAO, and ALO. We decided on the earlier SAO costume, even though it barely shows up in the show. It seemed easier than the later SAO outfit and more recognizable.


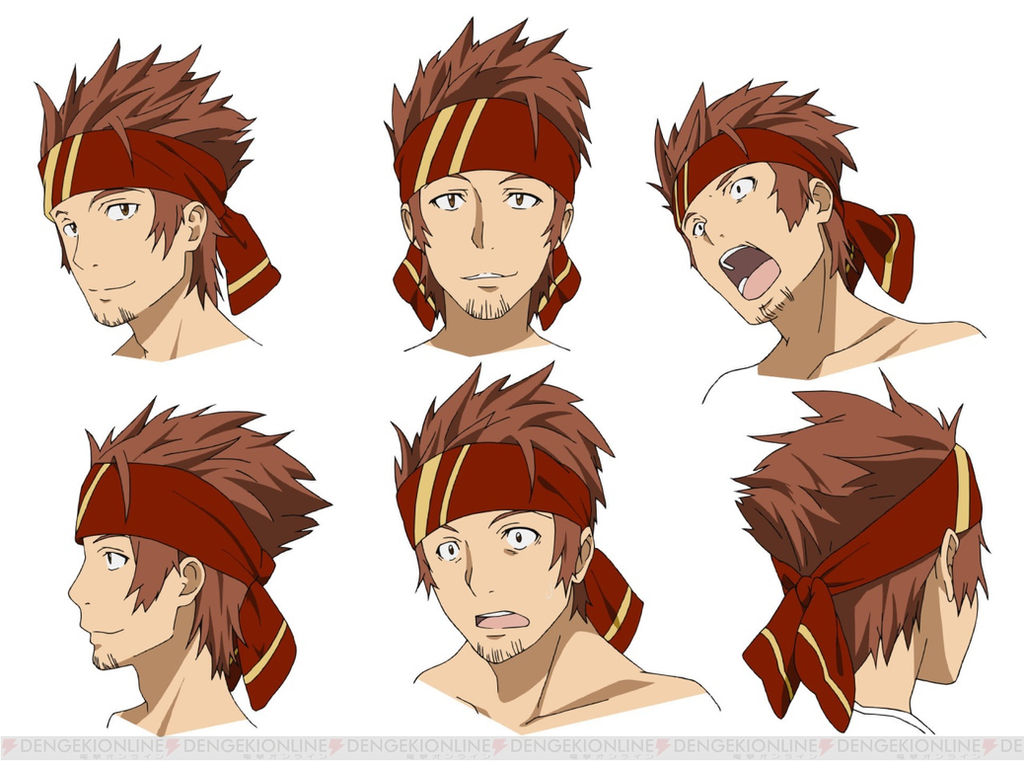
For the headband I cut out a 8"x40" strip of red fabric (the same as the jacket), and various sizes of yellow cotton fabric. I carefully cut the red piece where the yellow needed to be added and sewed the yellow making sure to keep the seam on the opposite side. After the yellow was done, I sewed it shut along the long side and then pulled it inside out. I roll hemmed the short edges. Because of the diagonal lines and the fold it is reversible on either side and has to be switched when flipped over.


I cut out the pattern for the chest armor on brown paper and then tapped it on to the pleather (can't use pins because the holes are permanent). I added a bit extra to the bottom to fold over and sew since the weight of the padding is going to be resting on it.


Sewed dark grey bias trim to the top and bottom of the front of the pleather.
Update: Foam diamonds were added for MechaCon 2015.


For the front, I sewed a button hole for the straps to fit through then I unraveled them a bit and tied them in 2 separate knots so they would not fit back through the button hole. For the back, I was able to sew the straps to the black material behind the pleather.
Later, I hand tacked the top "pointy" parts of the armor to stay up.

To keep the shoulder pad in place, I added a small width elastic to stretch from the front elastic all the way around the chest. (The first time he wore it it kept slipping down.)

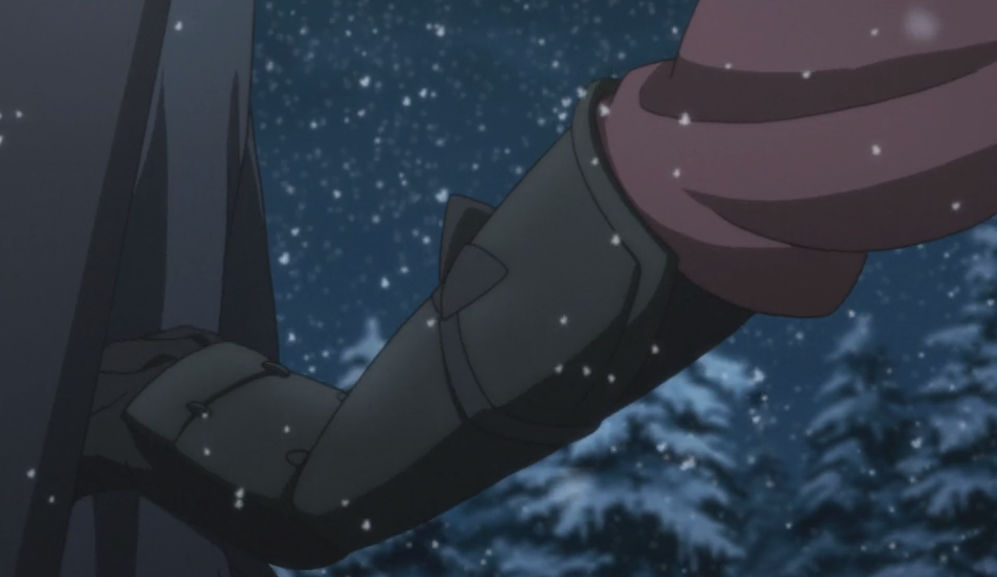
Reference Image from SAO episode 3.


The first pair of gloves were too wide around the arm and I tried to use the wrist strap on the gloves to hold the arm guards in place. This resulted in very limited wrist movement.
Update: Improvements made for MechaCon 2015


Pleather strips (1.75"x6.5") folded in half and sewn down to hold the arm guards around the wrist.


Final look before the strip of black fabric is tied around the back piece of elastic.
I got Black Dr. Martens Triumph 2 Boots from Journeys (around $100) but I don't think Journeys sells them anymore.
Similar to these boots on:

Similar can be found on Amazon from $10-$50:
 If you sew it the holes are permanent, hot glue works on the fabric side but not the pleather side, glueing pleather to pleather or foam requires E6000 glue (had to experiment with glues for a while). All in all I learned a lot about pleather, I don't hate it but I definitely won't use it in large quantities if I don't have to. I am pretty satisfied at how it looks as armor and I'm glad I used pleather and padding instead of L200 foam.
The costume as a whole - he is pretty recognizable with or without Lisbeth around. Somewhat uncomfortable considering the padding doesn't allow for bending around the stomach much (as in sitting) and the gloves/arm guards allow limited wrist movement. Luckily the chest armor design is easy to take on and off, so sitting for extended periods of time it can be removed and set aside.
Worn at the following conventions/meetups:

Taken at Louisianime 2015
Update: Added more pictures from Mechacon 2015


Picutre taken by: inochi-kitsune.deviantart.com/

Picture taken by Teknoman Omega
Update: We did a photoshoot in January 2016 at a beautiful Arboretum


Klein is a very interesting character and even though he shows no interest in Lisbeth in the show, I feel like if given the time they would get close and be together
This journal is about Klein's costume specifically, read about Lisbeth's costume here.
Reference
Sword Art Online Wikia: KleinKlein has 4 in-game outfits (as of the current GGO Arc): Day 1, Early SAO, Later SAO, and ALO. We decided on the earlier SAO costume, even though it barely shows up in the show. It seemed easier than the later SAO outfit and more recognizable.


Wig & Headband
LightInTheBox Klein Wig

- Before styling
- After styling (more was cut off the top later)

For the headband I cut out a 8"x40" strip of red fabric (the same as the jacket), and various sizes of yellow cotton fabric. I carefully cut the red piece where the yellow needed to be added and sewed the yellow making sure to keep the seam on the opposite side. After the yellow was done, I sewed it shut along the long side and then pulled it inside out. I roll hemmed the short edges. Because of the diagonal lines and the fold it is reversible on either side and has to be switched when flipped over.


- Wig Headband test front
- Wig Headband test side
Jacket
Materials:
- Sew Classic Bengaline Suiting Fabric Biking Red
- Jacket


- Front of Jacket
- Back of Jacket


- Sleeve after being sewn shut
- Front, back and sleeves sewn together (I used pieces of paper to show the difference between front and back)
Armor
Pattern:

Materials:
- Pleather Fabric Black
- Armor
- Single Fold Bias Dark Grey
- Armor trim
- Braided Belting Material
- Cannot find a link, but it is a Simplicity belting material
- Sheet of Foam
- Used for the diamonds on the chest piece
- Thickness does not matter
- Sticky Back Velcro Tape
- Knee pads from Walmart
- Shoulder armor
- Thick padding
- Have no idea what it is, I got it from a friend to use as the padding for the chest and back armor
- E600 glue
Chest Armor:
The armor that covers his front and back.
I cut out the pattern for the chest armor on brown paper and then tapped it on to the pleather (can't use pins because the holes are permanent). I added a bit extra to the bottom to fold over and sew since the weight of the padding is going to be resting on it.


- Sewed a layer of black to the inside of the armor with a slit for the padding to fit through (padding was trimmed later for ease of movement).
- Added buttons to hold the flaps up and the padding in place

Sewed dark grey bias trim to the top and bottom of the front of the pleather.
Update: Foam diamonds were added for MechaCon 2015.


- Diamonds were approximately 1"x2" and rough lines were made between these measurements
- I glued them to the chest piece using E6000 glue. One dot in the middle to get them in place. After it dried, I came back and added more glue to the corners.
For the front, I sewed a button hole for the straps to fit through then I unraveled them a bit and tied them in 2 separate knots so they would not fit back through the button hole. For the back, I was able to sew the straps to the black material behind the pleather.
Later, I hand tacked the top "pointy" parts of the armor to stay up.
Shoulder Armor:
For the shoulder armor, I used 2 knee pads (from Walmart) with a layer of pleather hot glued on top.- Before and after top
- Before and after under
Update: Improvement made for MechaCon 2015

To keep the shoulder pad in place, I added a small width elastic to stretch from the front elastic all the way around the chest. (The first time he wore it it kept slipping down.)
Arm Guards & Gloves:
Somewhat difficult and had to be redone after worn to Louisianime because he had no movement in his wrists.
Reference Image from SAO episode 3.


- Top & bottom hot glued a strip of black fabric so it would not rub against anything (the padding is itchy)
- Before & after pleather hot glued around it (fabric shows on the bottom side and pleather on top)
- Hand sewed a piece of elastic to go around the thicker part of the arm guard (Update: seen in later pictures)
- Cut out and sewed a small strip of black to cover over the top part of the elastic
Update: Improvements made for MechaCon 2015


Pleather strips (1.75"x6.5") folded in half and sewn down to hold the arm guards around the wrist.


- Cut slits into the arm guards to fit the pleather strips through. Then sewed a piece of elastic from one end to the other.
- Bought different gloves to fit around the arm better. Raider Black Large Leather Motorcycle Riding Gloves from Amazon

Final look before the strip of black fabric is tied around the back piece of elastic.
Pants
Decided not to go with white (white pants should be avoided when possible), figured light grey would be suitable.Boots
Same boots as used for the Zoro (One Piece) Cosplay.I got Black Dr. Martens Triumph 2 Boots from Journeys (around $100) but I don't think Journeys sells them anymore.
Similar to these boots on:

Sword
We used a black plastic Bokken that we've had for several years that has been hanging around the house.Similar can be found on Amazon from $10-$50:
Complete
This cosplay was an experience, I had never used pleather before and boy is that stuff weirdThe costume as a whole - he is pretty recognizable with or without Lisbeth around. Somewhat uncomfortable considering the padding doesn't allow for bending around the stomach much (as in sitting) and the gloves/arm guards allow limited wrist movement. Luckily the chest armor design is easy to take on and off, so sitting for extended periods of time it can be removed and set aside.
Worn at the following conventions/meetups:
- LAC Spring Meetup 2015
- Louisianime 2015
- Mechacon 2015
- Louisiana Comic Con Lafayette 2015
- Oni-Con 2015
- New Orleans Comic Con 2016

Taken at Louisianime 2015
Update: Added more pictures from Mechacon 2015


Picutre taken by: inochi-kitsune.deviantart.com/

Picture taken by Teknoman Omega
Update: We did a photoshoot in January 2016 at a beautiful Arboretum


Howl's Moving Castle: Howl and Sophie
[I stopped updating my DeviantArt because my focus had changed from creating cosplay to creating and managing a community. My effort has had a new direction more towards planning cosplay involvement at conventions and cosplay meetups which you can find more about at www.LouisianaCosplayers.com. I started this draft in 2018 about cosplays we wore in Sept 2016 and decided to finish it with what I have available and what I can remember. I also had to rewrite the entire draft using the god awful DeviantArt Eclipse since I finished it in Sta.sh and it will not let me publish it as a journal. Why can't I just RESIZE A PHOTO? Excuse the extremely bad formatting in this journal I'm working with basically nothing compared to the original journal's UI.] We had been wanting to cosplay from a Miyazaki movie for quite some time and decided that our annual meetup at the zoo was the perfect occasion to debut some new cosplays. Quick characters with not much detail that fit our sizes? Gotta
Pokemon Gijinka: Charizard
Extension of Pokemon Gijinka: Blastoise
One of our big goals for 2016 was to be part of a Pokémon Gijinka group for MechaCon. It just so happened halfway through working on them that Pokémon GO came out! It was already a big year for Pokémon with the 20th anniversary but right before our debut it hit big again and everyone was playing the game. We chose to cosplay the original starters in the group, with myself as Blastoise, my boyfriend as Charizard and our friend ineedsugar as Venusaur. ineesugar did most of the sewing for Charizard and the wings were a group effort. I'm sorry in advance for my lack of pictures.
[Note: T
Pokemon Gijinka: Blastoise
One of our big goals for 2016 was to be part of a Pokémon Gijinka group for MechaCon. It just so happened halfway through working on them that Pokémon GO came out! It was already a big year for Pokémon with the 20th anniversary but right before our debut it hit big again and everyone was playing the game. We chose to cosplay the original starters in the group, with myself as Blastoise, my boyfriend as Charizard and our friend ineedsugar as Venusaur.
[Note: I wrote this journal over the course of a year while working on several other projects.]
Reference The original reference drawn by ineedsugar on Illustrator. Some chan
Haikyuu!!: Daichi and Suga
Started watching Haikyuu!! in fall of 2015 and at first we wanted to cosplay the main duo Hinata and Kageyama but as we got to know the rest of the characters we found we were better suited to Daichi and Suga.
THESE COSPLAYS WERE NOT HANDMADE THEY WERE BOUGHT AND ALTERED!
ReferenceHaikyuu!! Wikia Daichi Sawamura
Haikyuu!! Wikia Kōshi Sugawara
The boys of Karasuno have three outfits: training, sweat suits, GAME TIME! Of course we went with the most recognizable outfits.
WigWe only used a wig for Suga. I bought a cheap Amazon wig for Suga and a friend cut it down and I styled it. Very hard to keep the part in the front and I hav
© 2015 - 2024 sxymegger
Comments3
Join the community to add your comment. Already a deviant? Log In
SOOOOOOO COOOOLLL!!! XD


